# Getting Started
## Workspace Dashboard
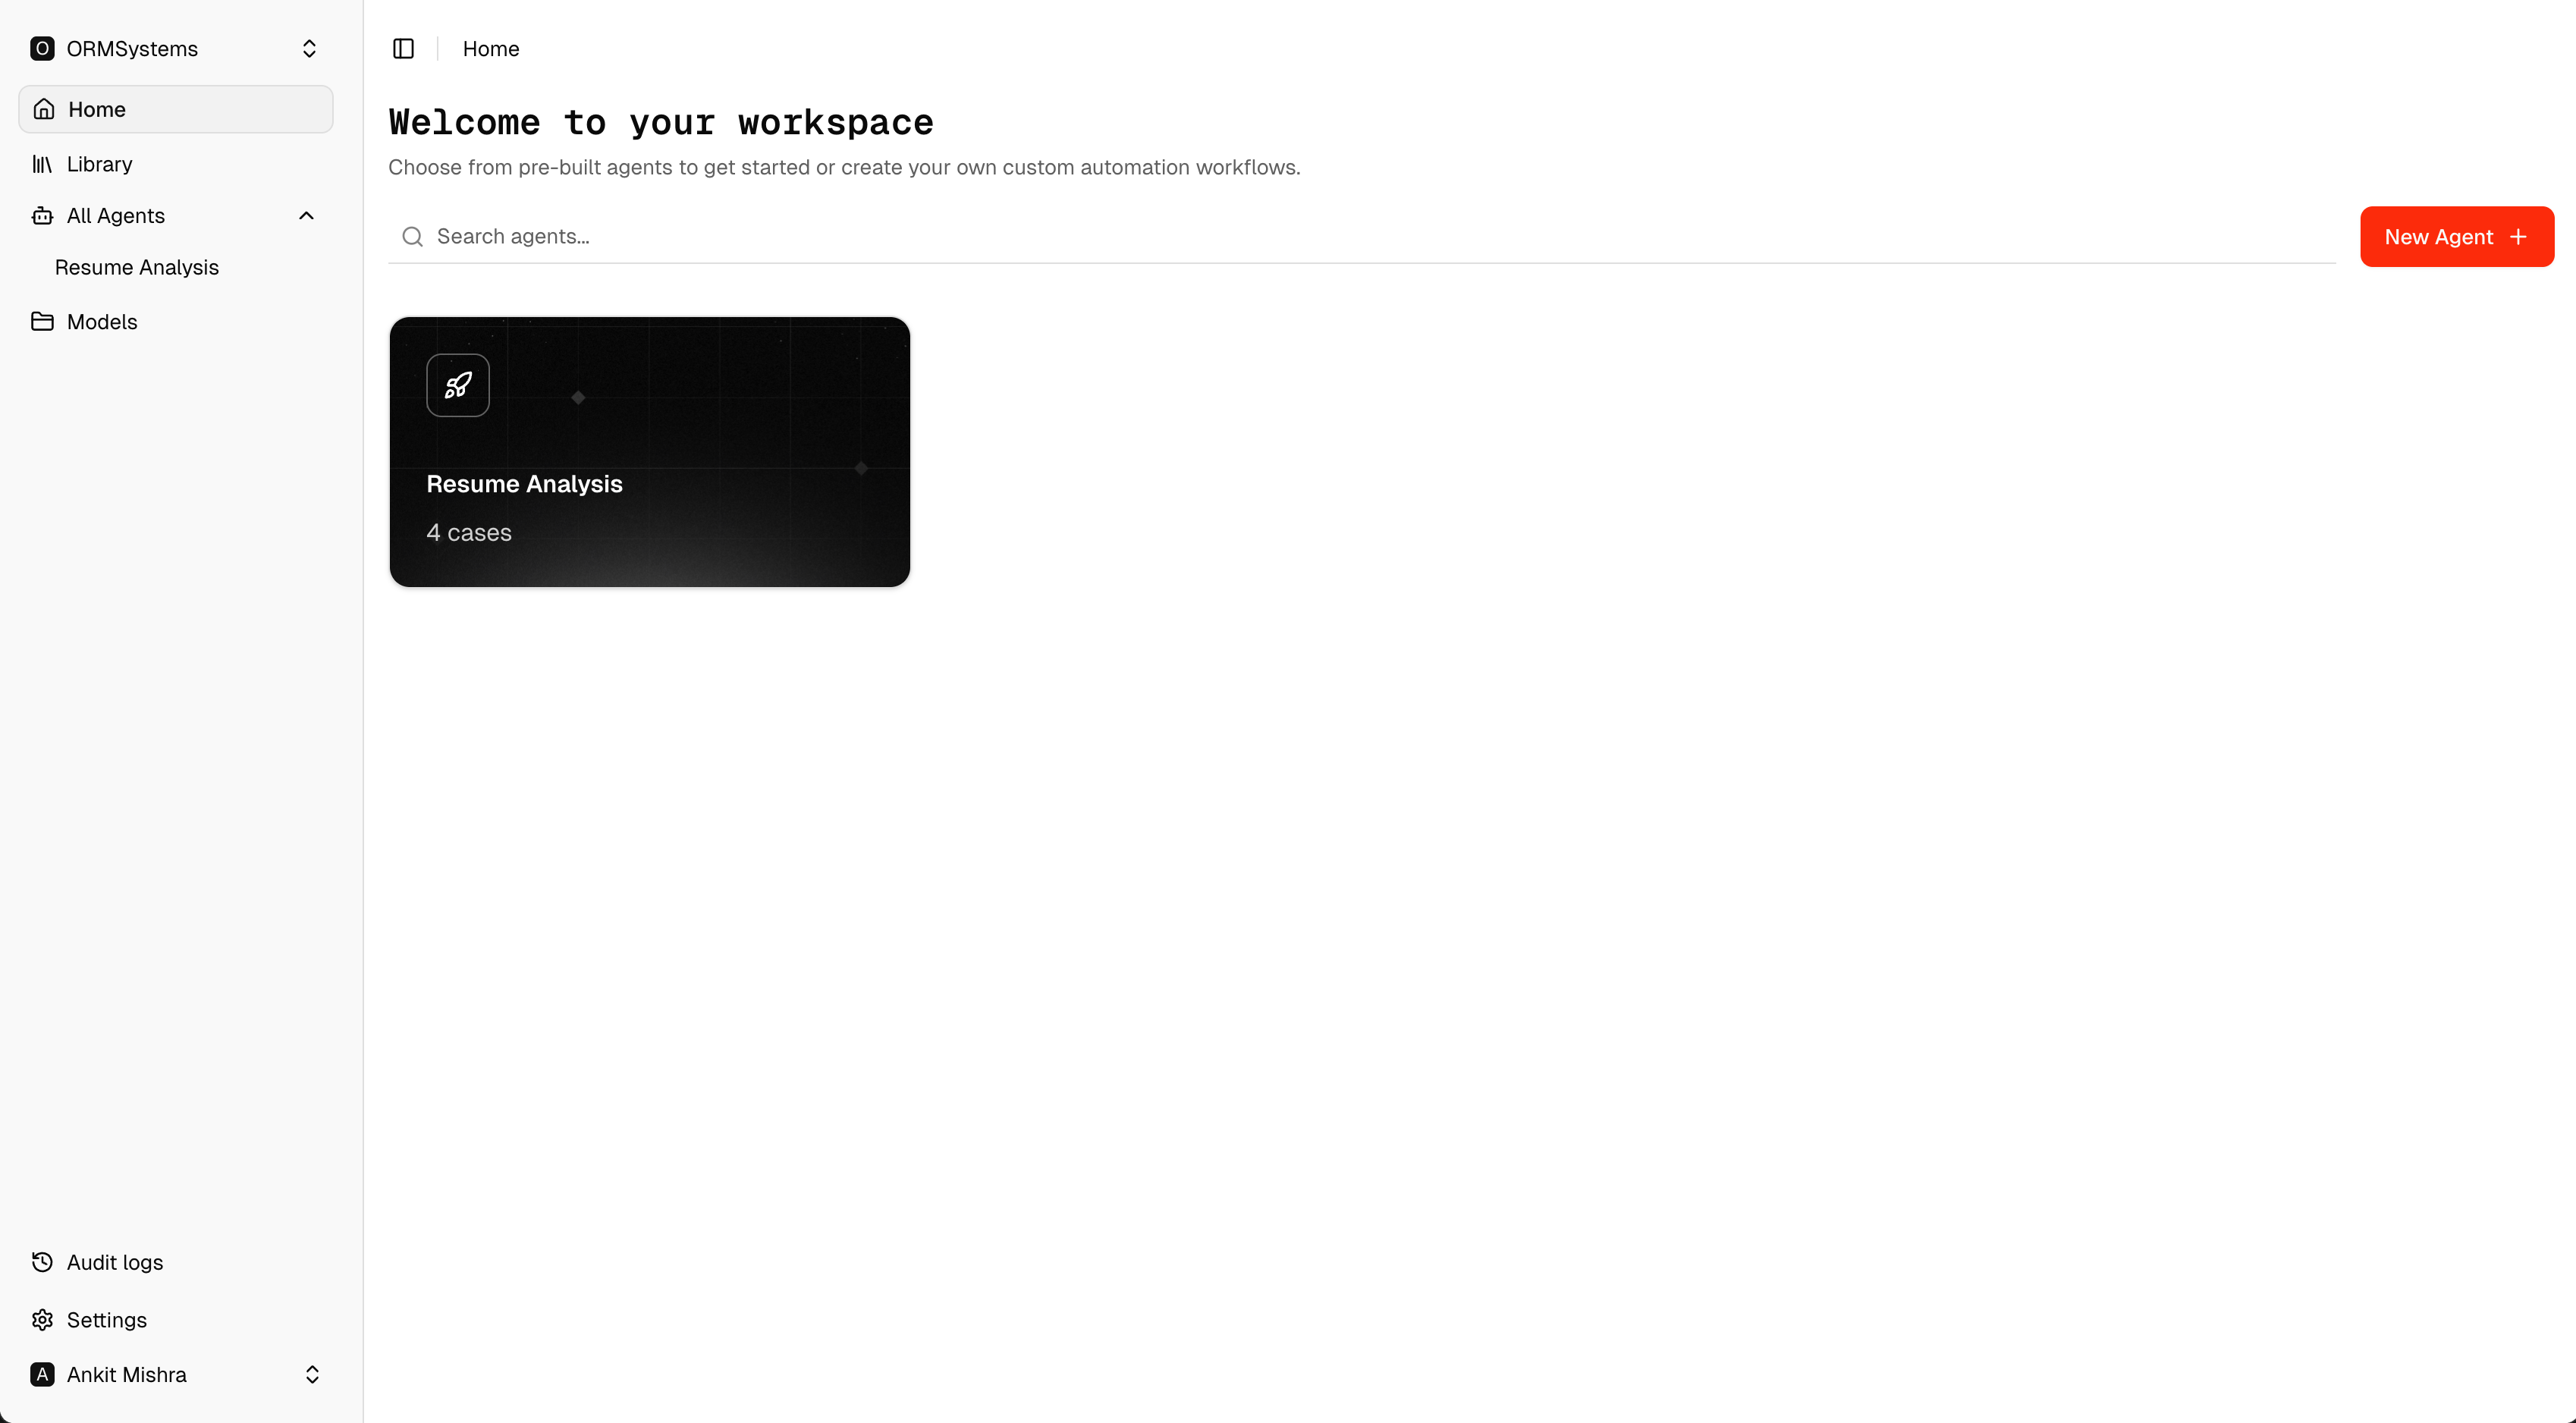 This is the main Forge workspace screen that appears after login. From here you can view existing agents, search for agents, and start creating a new workflow.
Key areas on this screen:
* **Home** — Returns you to the main workspace dashboard.
* **Library** — Opens the resource or document library.
* **All Agents** — Shows all agents available in the workspace.
* **Models** — Opens the model configuration page.
* **Audit Logs** — Displays activity and system logs.
* **Settings** — Lets you manage integrations, users, and workspace settings.
* **New Agent** — Starts the process of creating a new agent.
Begin here whenever you want to create a fresh automation workflow. Click **New Agent** in the top-right corner to get started.
***
## Models Configuration
Before creating an agent, models need to be configured.
This is the main Forge workspace screen that appears after login. From here you can view existing agents, search for agents, and start creating a new workflow.
Key areas on this screen:
* **Home** — Returns you to the main workspace dashboard.
* **Library** — Opens the resource or document library.
* **All Agents** — Shows all agents available in the workspace.
* **Models** — Opens the model configuration page.
* **Audit Logs** — Displays activity and system logs.
* **Settings** — Lets you manage integrations, users, and workspace settings.
* **New Agent** — Starts the process of creating a new agent.
Begin here whenever you want to create a fresh automation workflow. Click **New Agent** in the top-right corner to get started.
***
## Models Configuration
Before creating an agent, models need to be configured.
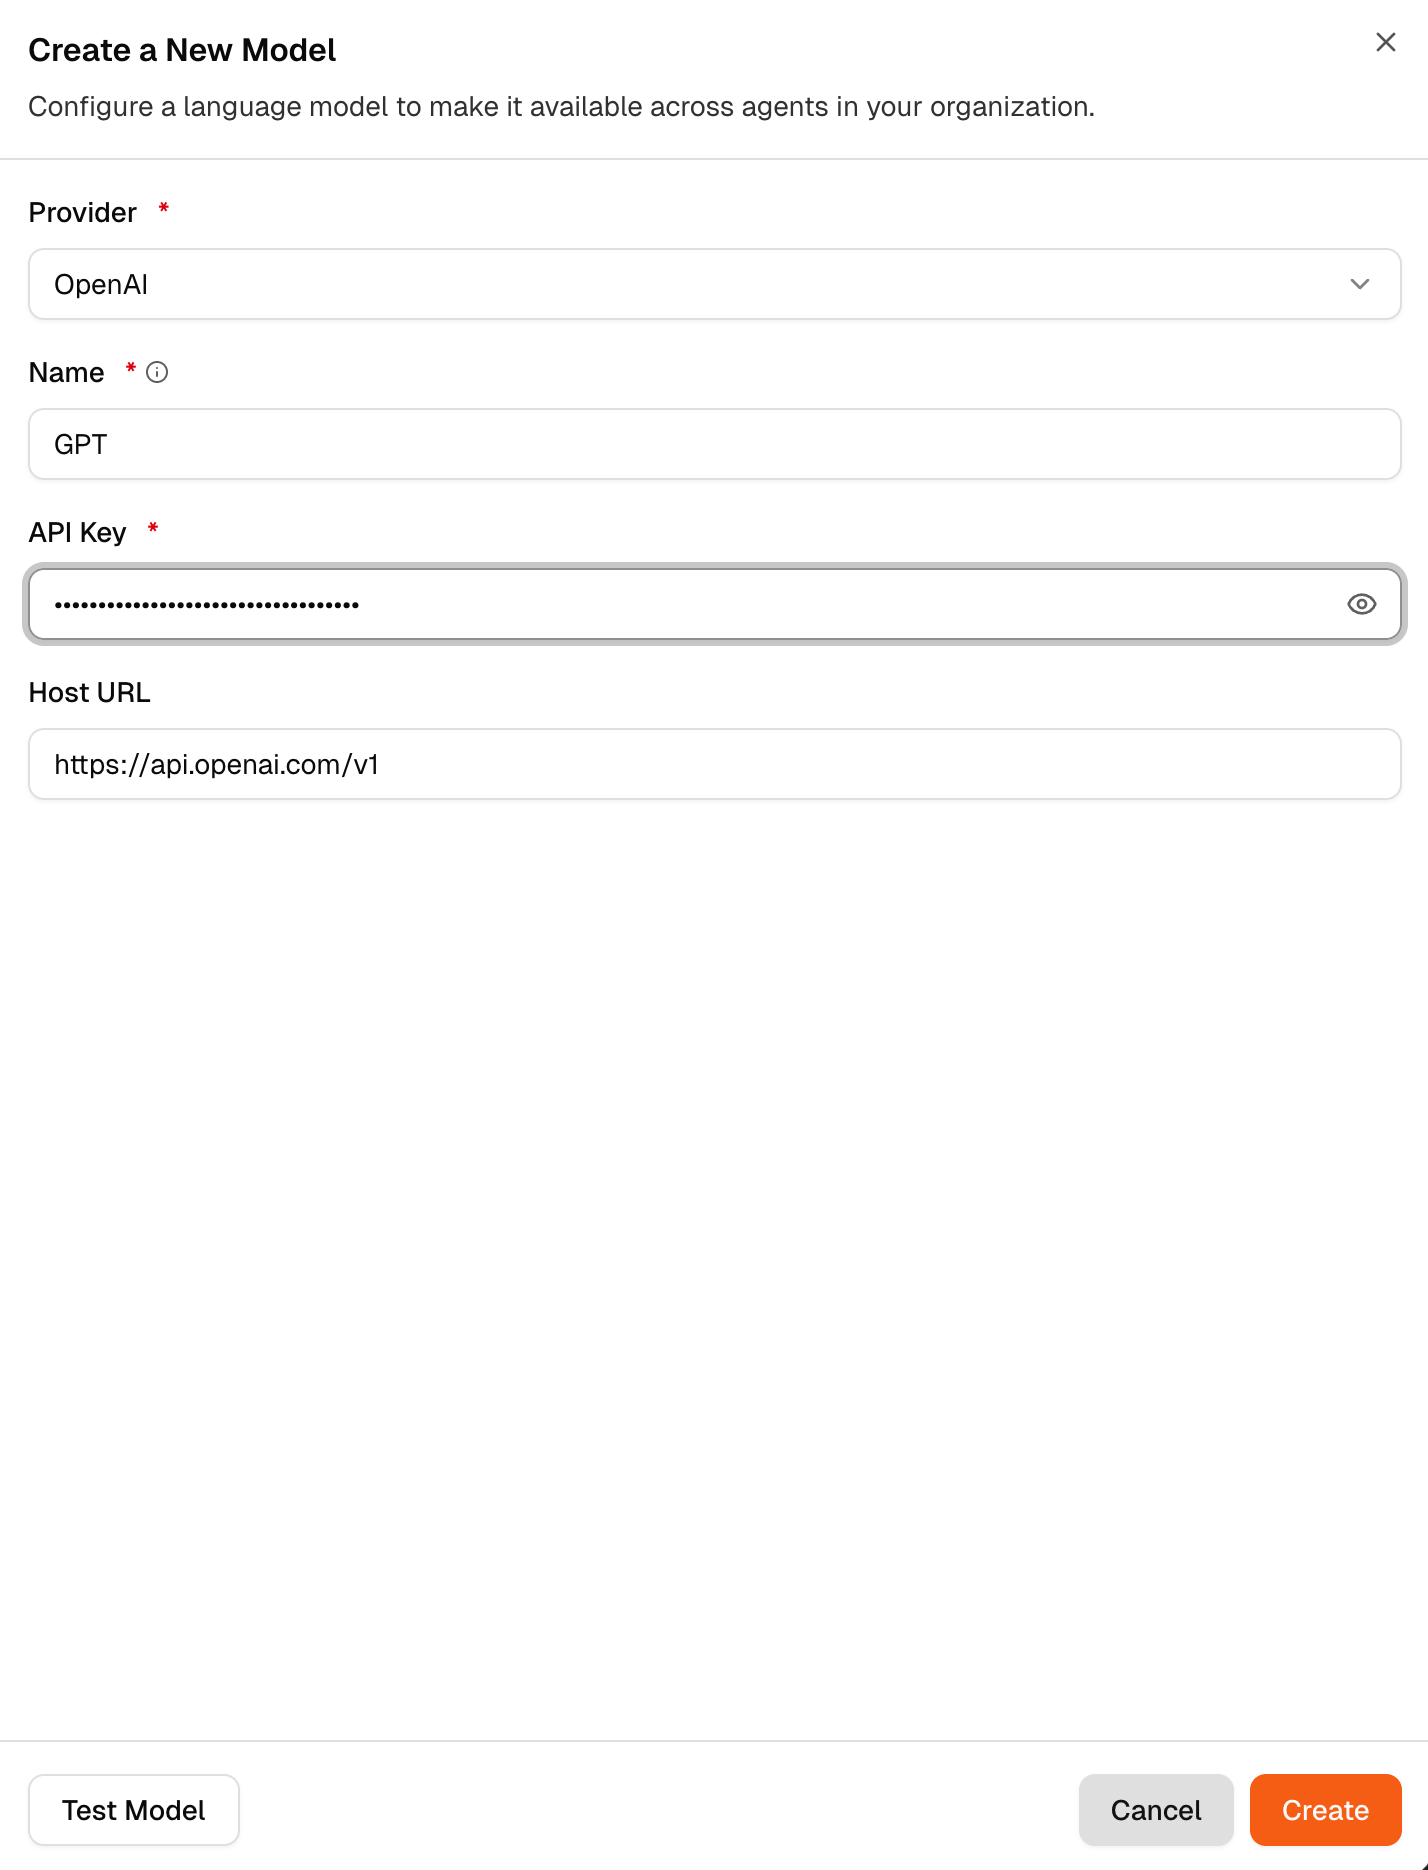 This screen is used to create and manage language models inside Forge. Models configured here become available across all agents in the workspace.
The model setup form includes the following fields:
* **Provider**
* **Model Name** — You can give any name of your choice.
* **API Key**
* **Host URL**
Host URL is set by default for each provider. It is not recommended to change it.
This page is generally used by an administrator or technical user responsible for connecting external model providers. Typical tasks include:
* Adding a new model provider
* Making a provider available for agents across the organization
* Testing the API key connection and usage
If providers are already configured for the workspace, end users typically do not need to make changes here. They can simply choose the model made available by that API key when configuring fields.
***
## Create a New Agent
This screen is used to create and manage language models inside Forge. Models configured here become available across all agents in the workspace.
The model setup form includes the following fields:
* **Provider**
* **Model Name** — You can give any name of your choice.
* **API Key**
* **Host URL**
Host URL is set by default for each provider. It is not recommended to change it.
This page is generally used by an administrator or technical user responsible for connecting external model providers. Typical tasks include:
* Adding a new model provider
* Making a provider available for agents across the organization
* Testing the API key connection and usage
If providers are already configured for the workspace, end users typically do not need to make changes here. They can simply choose the model made available by that API key when configuring fields.
***
## Create a New Agent
 This screen appears after clicking **New Agent**. Fill in the following:
* **Agent Name** — A clear, specific name so the agent is easy to identify later.
* **Description** — A short explanation of what the agent is intended to do and what kind of documents it will process.
After entering the details, click **Create Agent**.
This screen appears after clicking **New Agent**. Fill in the following:
* **Agent Name** — A clear, specific name so the agent is easy to identify later.
* **Description** — A short explanation of what the agent is intended to do and what kind of documents it will process.
After entering the details, click **Create Agent**.
 Once the agent is created, click the **+** icon next to the File field to define the fields Forge should extract from your documents.
***
## Uploading Files
### Google Drive Integration
Once the agent is created, click the **+** icon next to the File field to define the fields Forge should extract from your documents.
***
## Uploading Files
### Google Drive Integration
 You can connect Google Drive to enable automatic file fetching from a linked folder.
To connect Google Drive:
1. Open **Settings**.
2. Stay on the **Integrations** tab.
3. Click **Connect to Google Drive**.
4. Sign in with the required Google account and grant access permissions.
You can connect Google Drive to enable automatic file fetching from a linked folder.
To connect Google Drive:
1. Open **Settings**.
2. Stay on the **Integrations** tab.
3. Click **Connect to Google Drive**.
4. Sign in with the required Google account and grant access permissions.
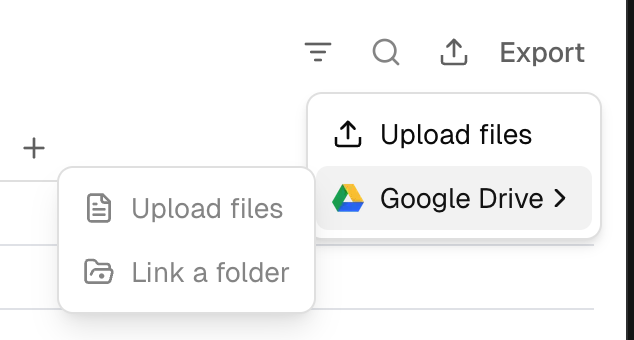 Once connected, link a folder to an agent. Forge will automatically fetch and process any files added to that folder, removing the need to upload manually.
The Settings screen can also be used to add new members, manage people in the workspace, and control organization-level access.
### Manual Upload
Once connected, link a folder to an agent. Forge will automatically fetch and process any files added to that folder, removing the need to upload manually.
The Settings screen can also be used to add new members, manage people in the workspace, and control organization-level access.
### Manual Upload
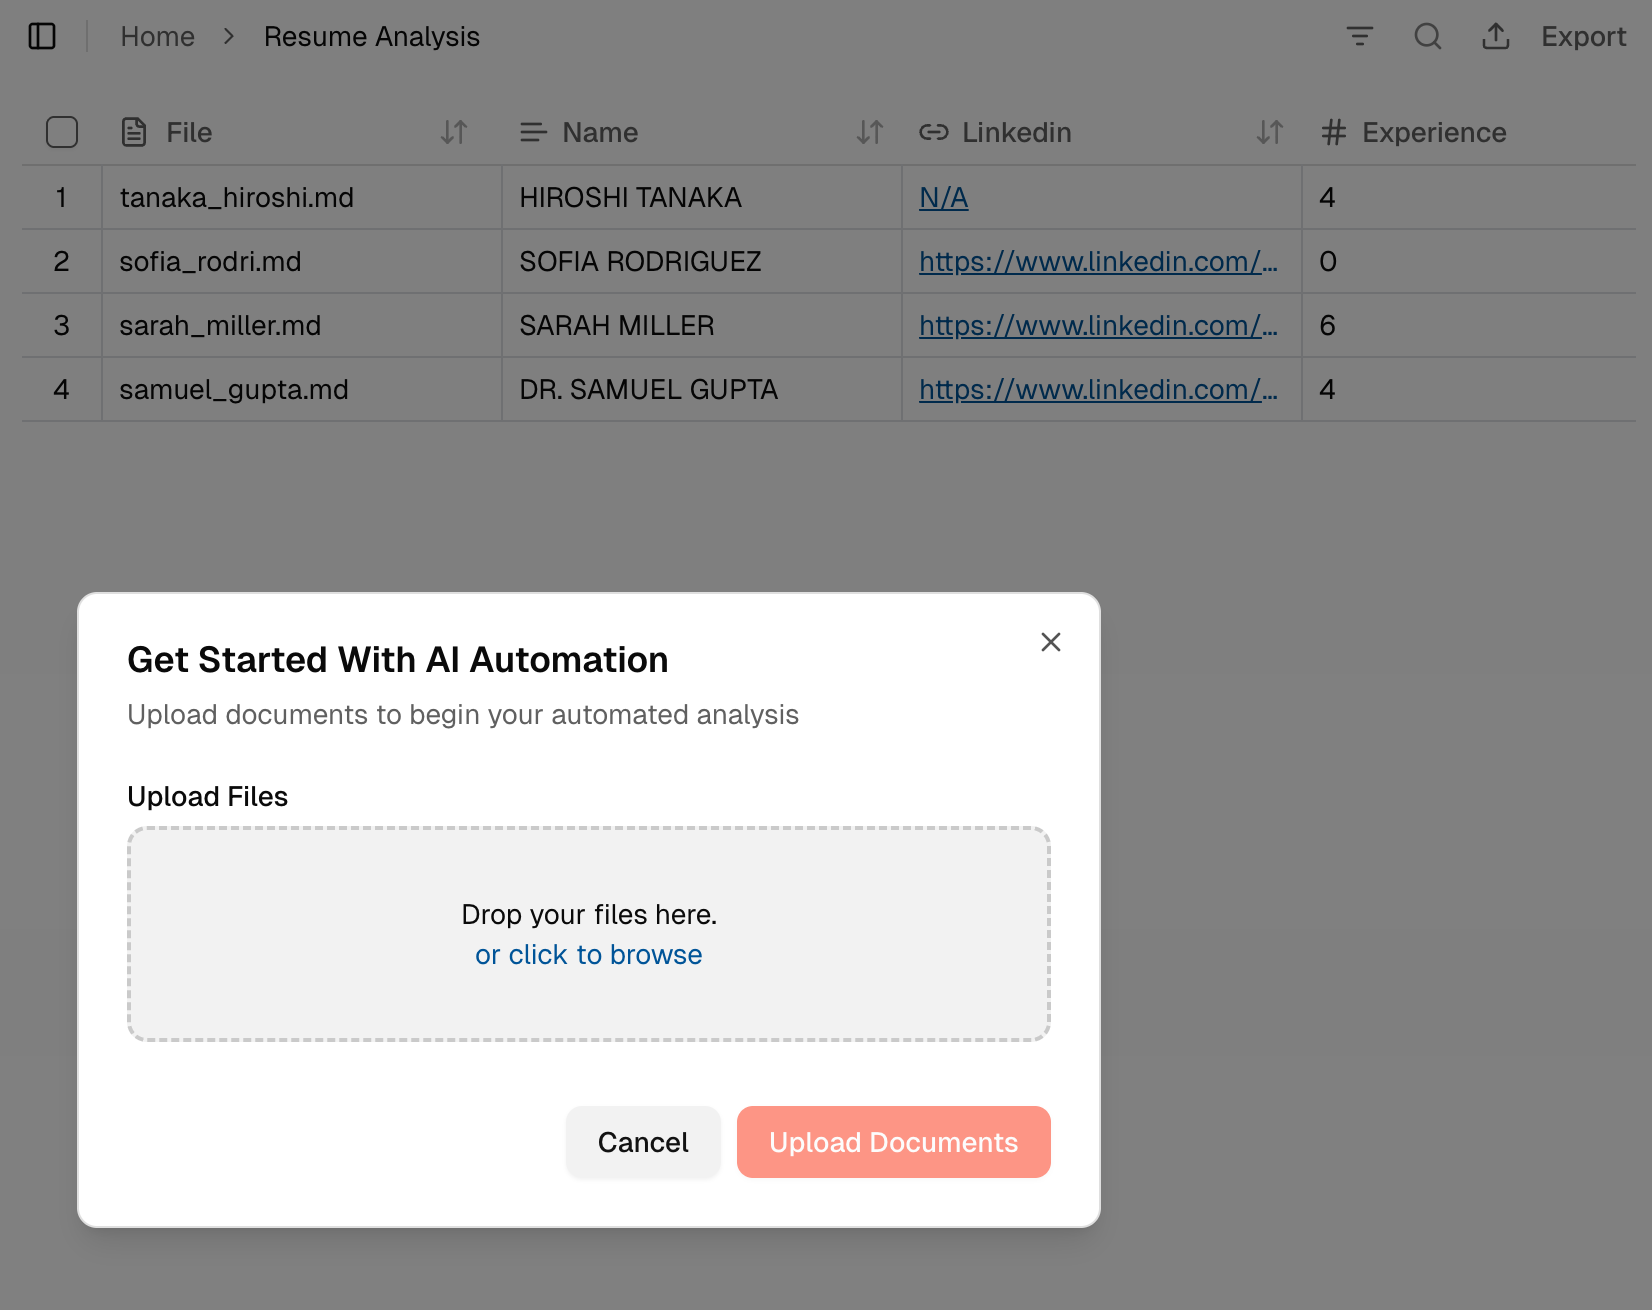 To upload files directly from your system, use the **Upload Files** option and either click to browse or drag and drop files onto the upload area.
***
## Field Creation
Fields define what information Forge extracts from your documents. Forge supports six field types:
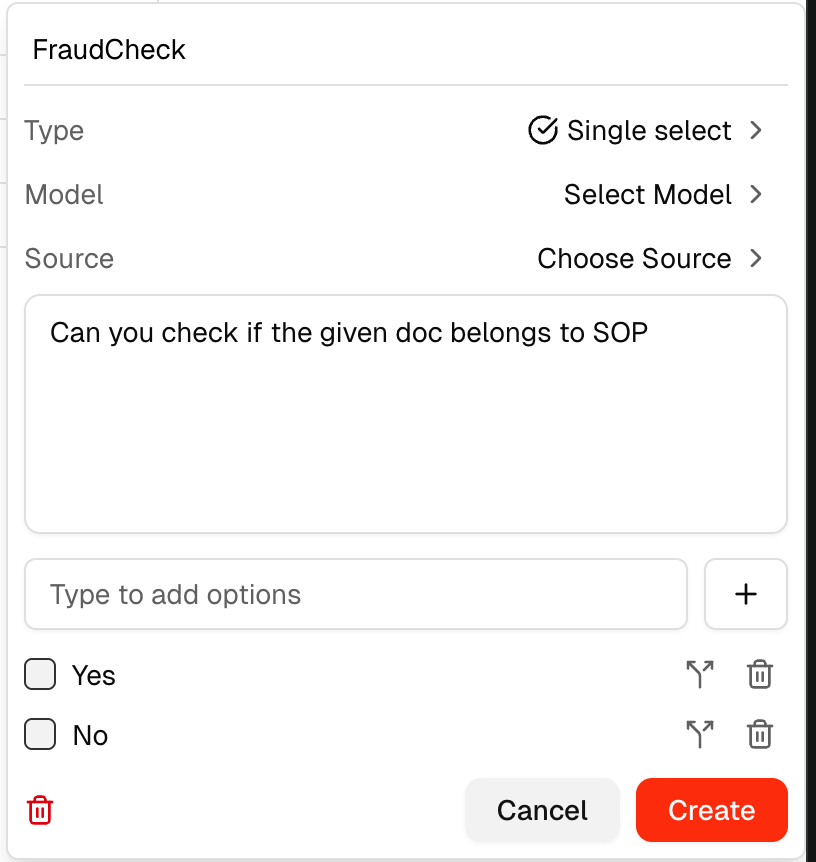
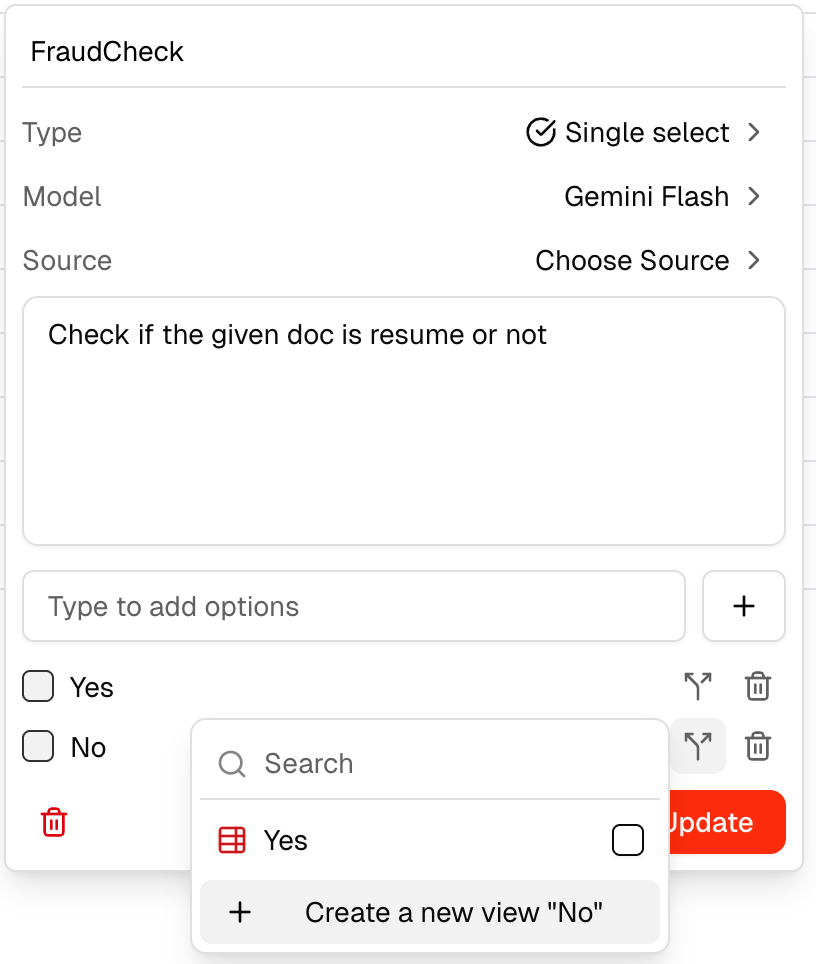
**Single Select** — Returns only one response from a set of specified options.
To upload files directly from your system, use the **Upload Files** option and either click to browse or drag and drop files onto the upload area.
***
## Field Creation
Fields define what information Forge extracts from your documents. Forge supports six field types:
**Single Select** — Returns only one response from a set of specified options.
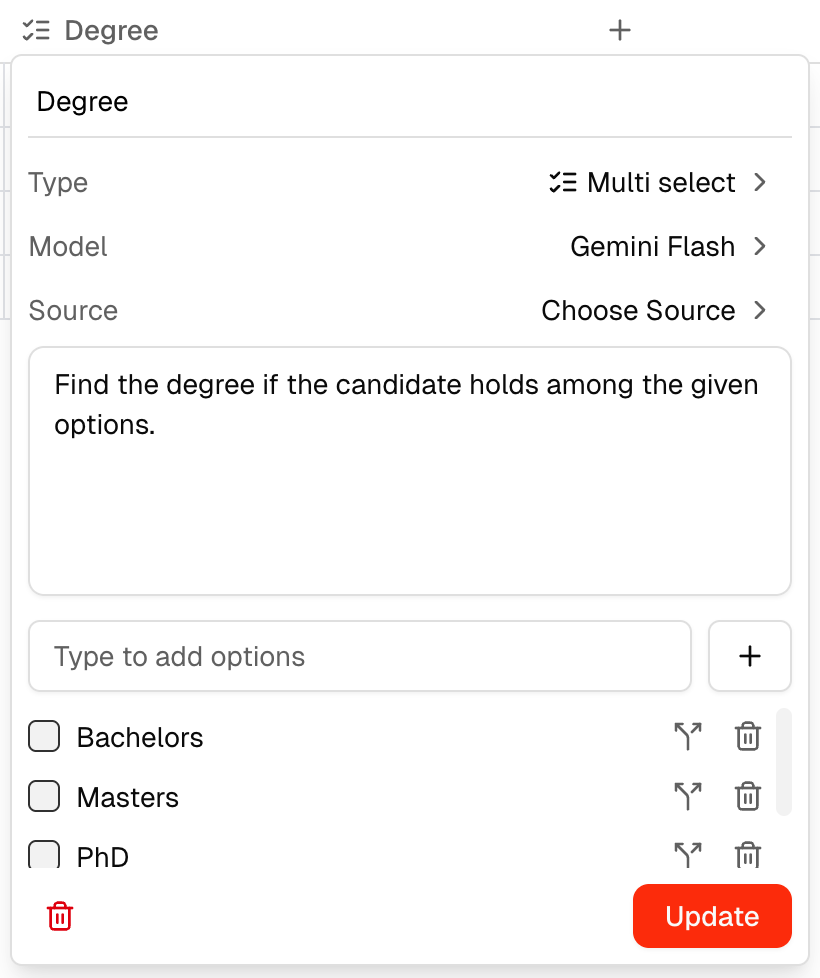
 **Multi Select** — Returns one or more responses from a set of specified options.
 **Collection** — Used for nested structured data.
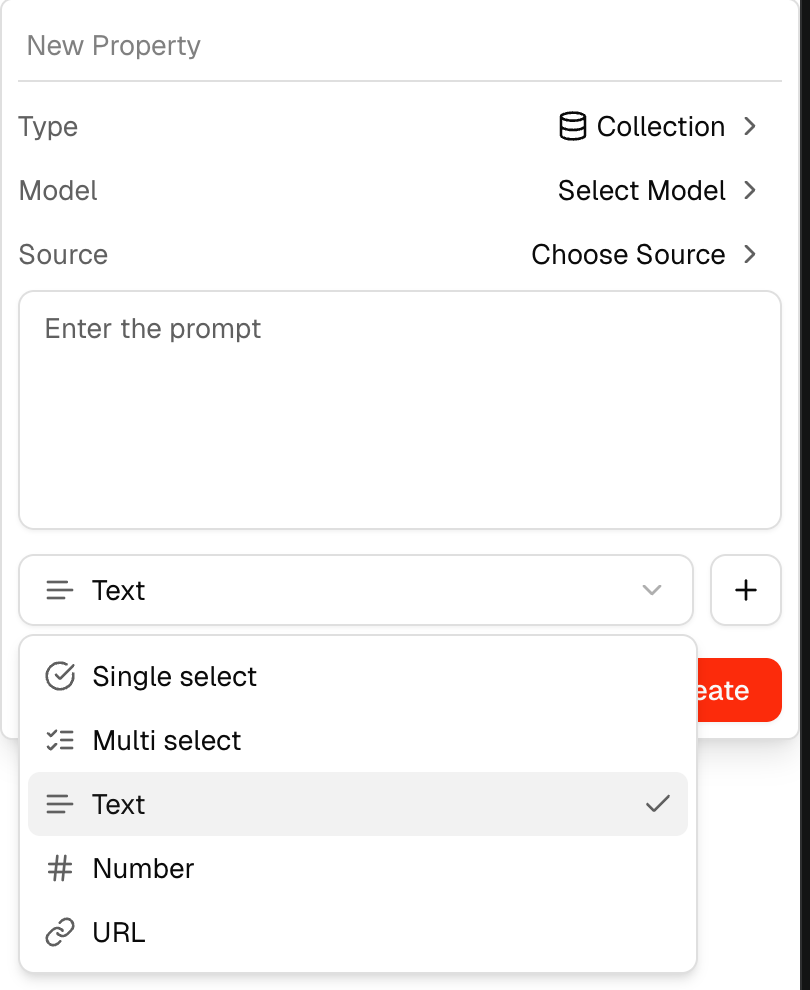 **Text** — Used for free-text outputs such as names, titles, or summaries.
**Number** — Used for numeric outputs. The Custom Data Format option lets you define the precision the model should follow, and you can enable a thousands separator for comma-formatted values.
**Text** — Used for free-text outputs such as names, titles, or summaries.
**Number** — Used for numeric outputs. The Custom Data Format option lets you define the precision the model should follow, and you can enable a thousands separator for comma-formatted values.
 **URL** — Used for links such as LinkedIn URLs or website addresses.
### Assigning a Model to a Field
**URL** — Used for links such as LinkedIn URLs or website addresses.
### Assigning a Model to a Field
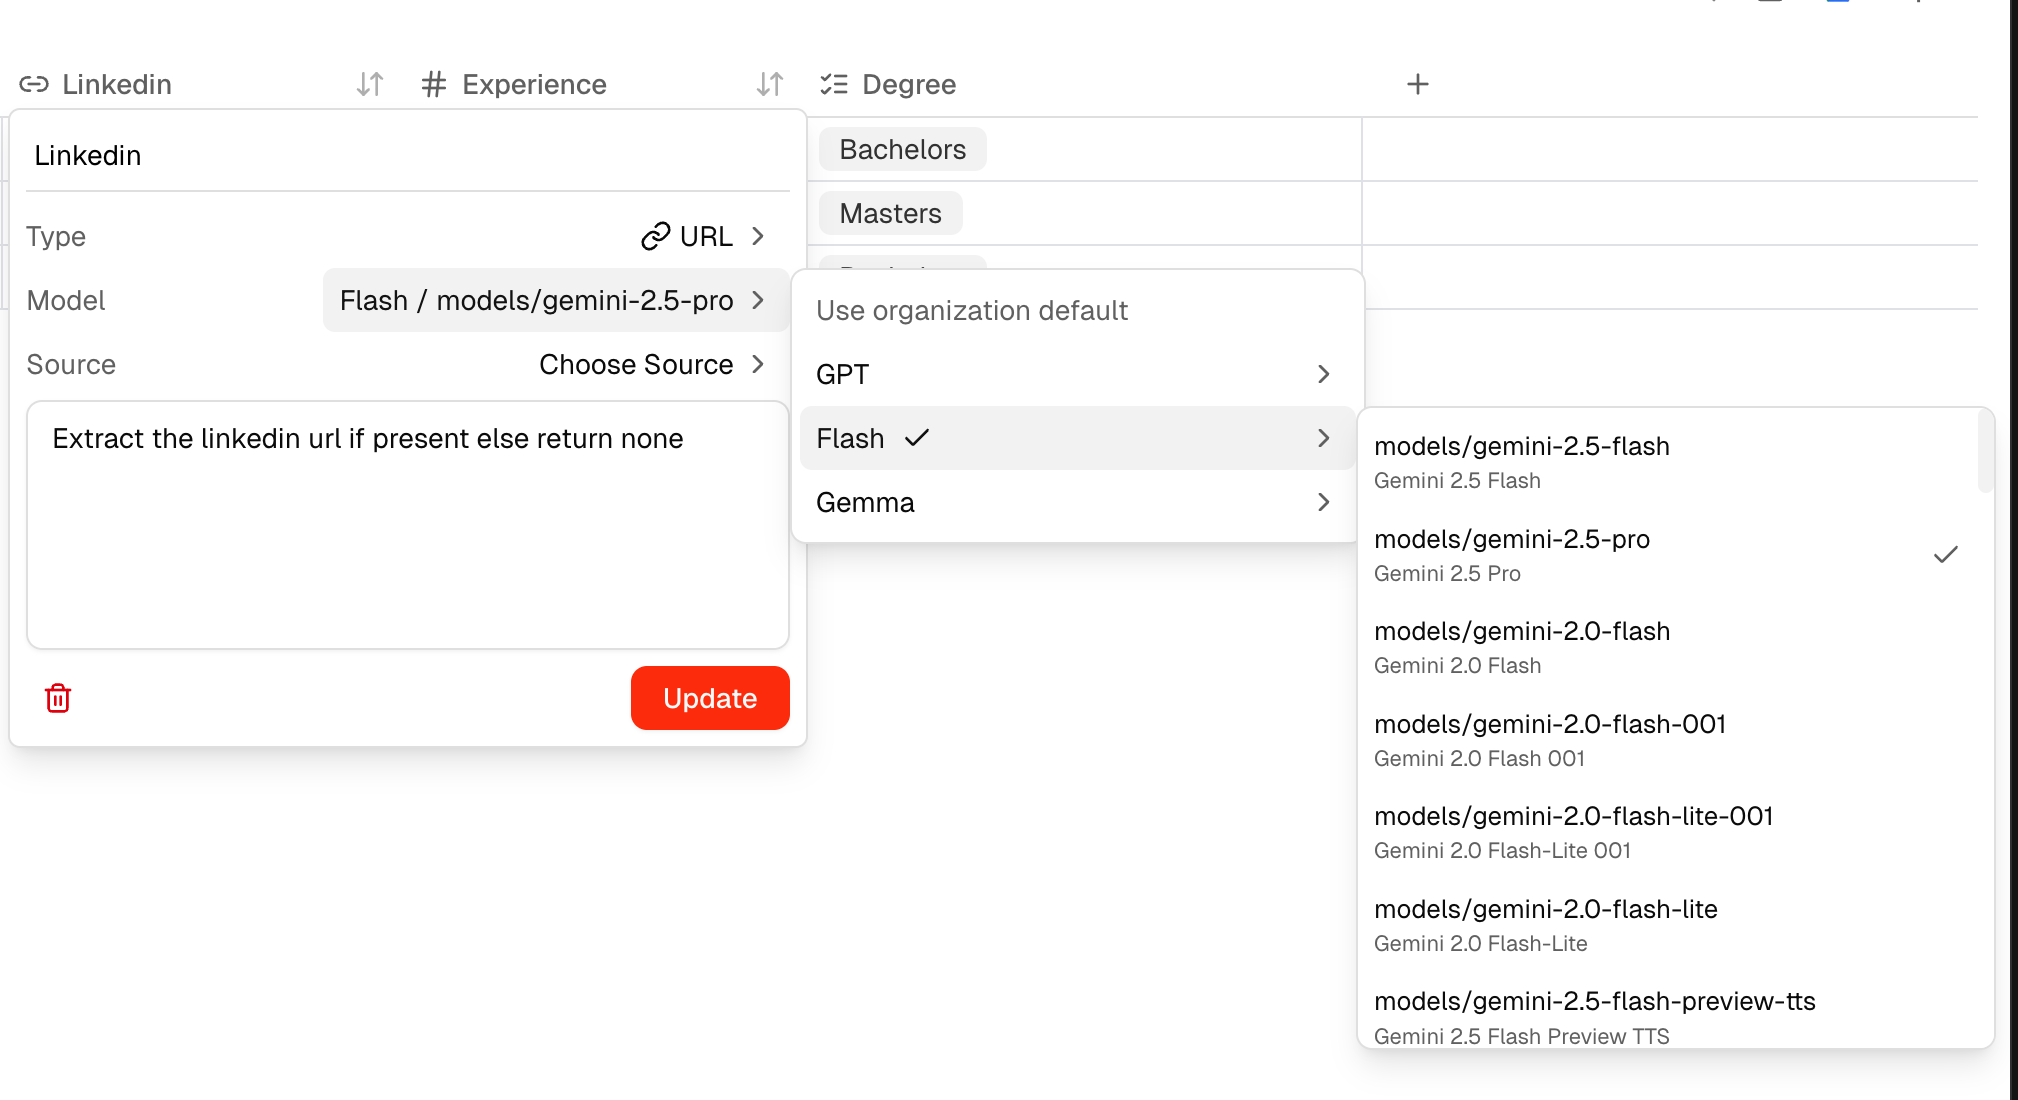 You can assign a specific model to each field directly from the field settings.
### Choose Source
The **Choose Source** option lets you add context to a field by selecting any file from the library (shown in the dropdown). This gives the model additional reference material when extracting values for that field.
***
## Triggering Evaluations
You can trigger an evaluation in two ways:
**Field Level** — Select one or more columns to run extraction for those specific fields across all files.
You can assign a specific model to each field directly from the field settings.
### Choose Source
The **Choose Source** option lets you add context to a field by selecting any file from the library (shown in the dropdown). This gives the model additional reference material when extracting values for that field.
***
## Triggering Evaluations
You can trigger an evaluation in two ways:
**Field Level** — Select one or more columns to run extraction for those specific fields across all files.
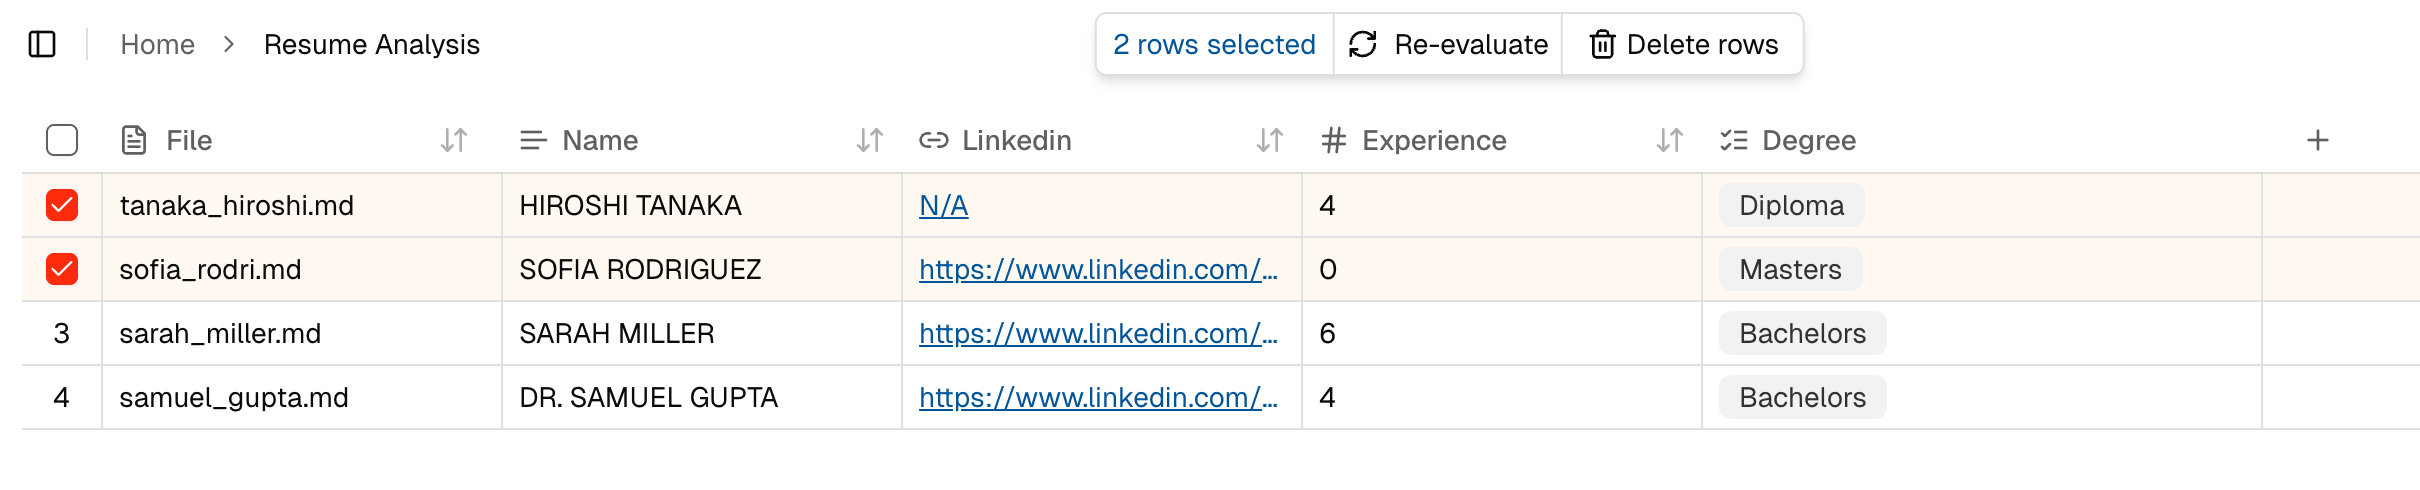
 **Asset Level** — Select one or more rows to run extraction for those specific files across all fields.
 ***
## Agent Output & Results
***
## Agent Output & Results
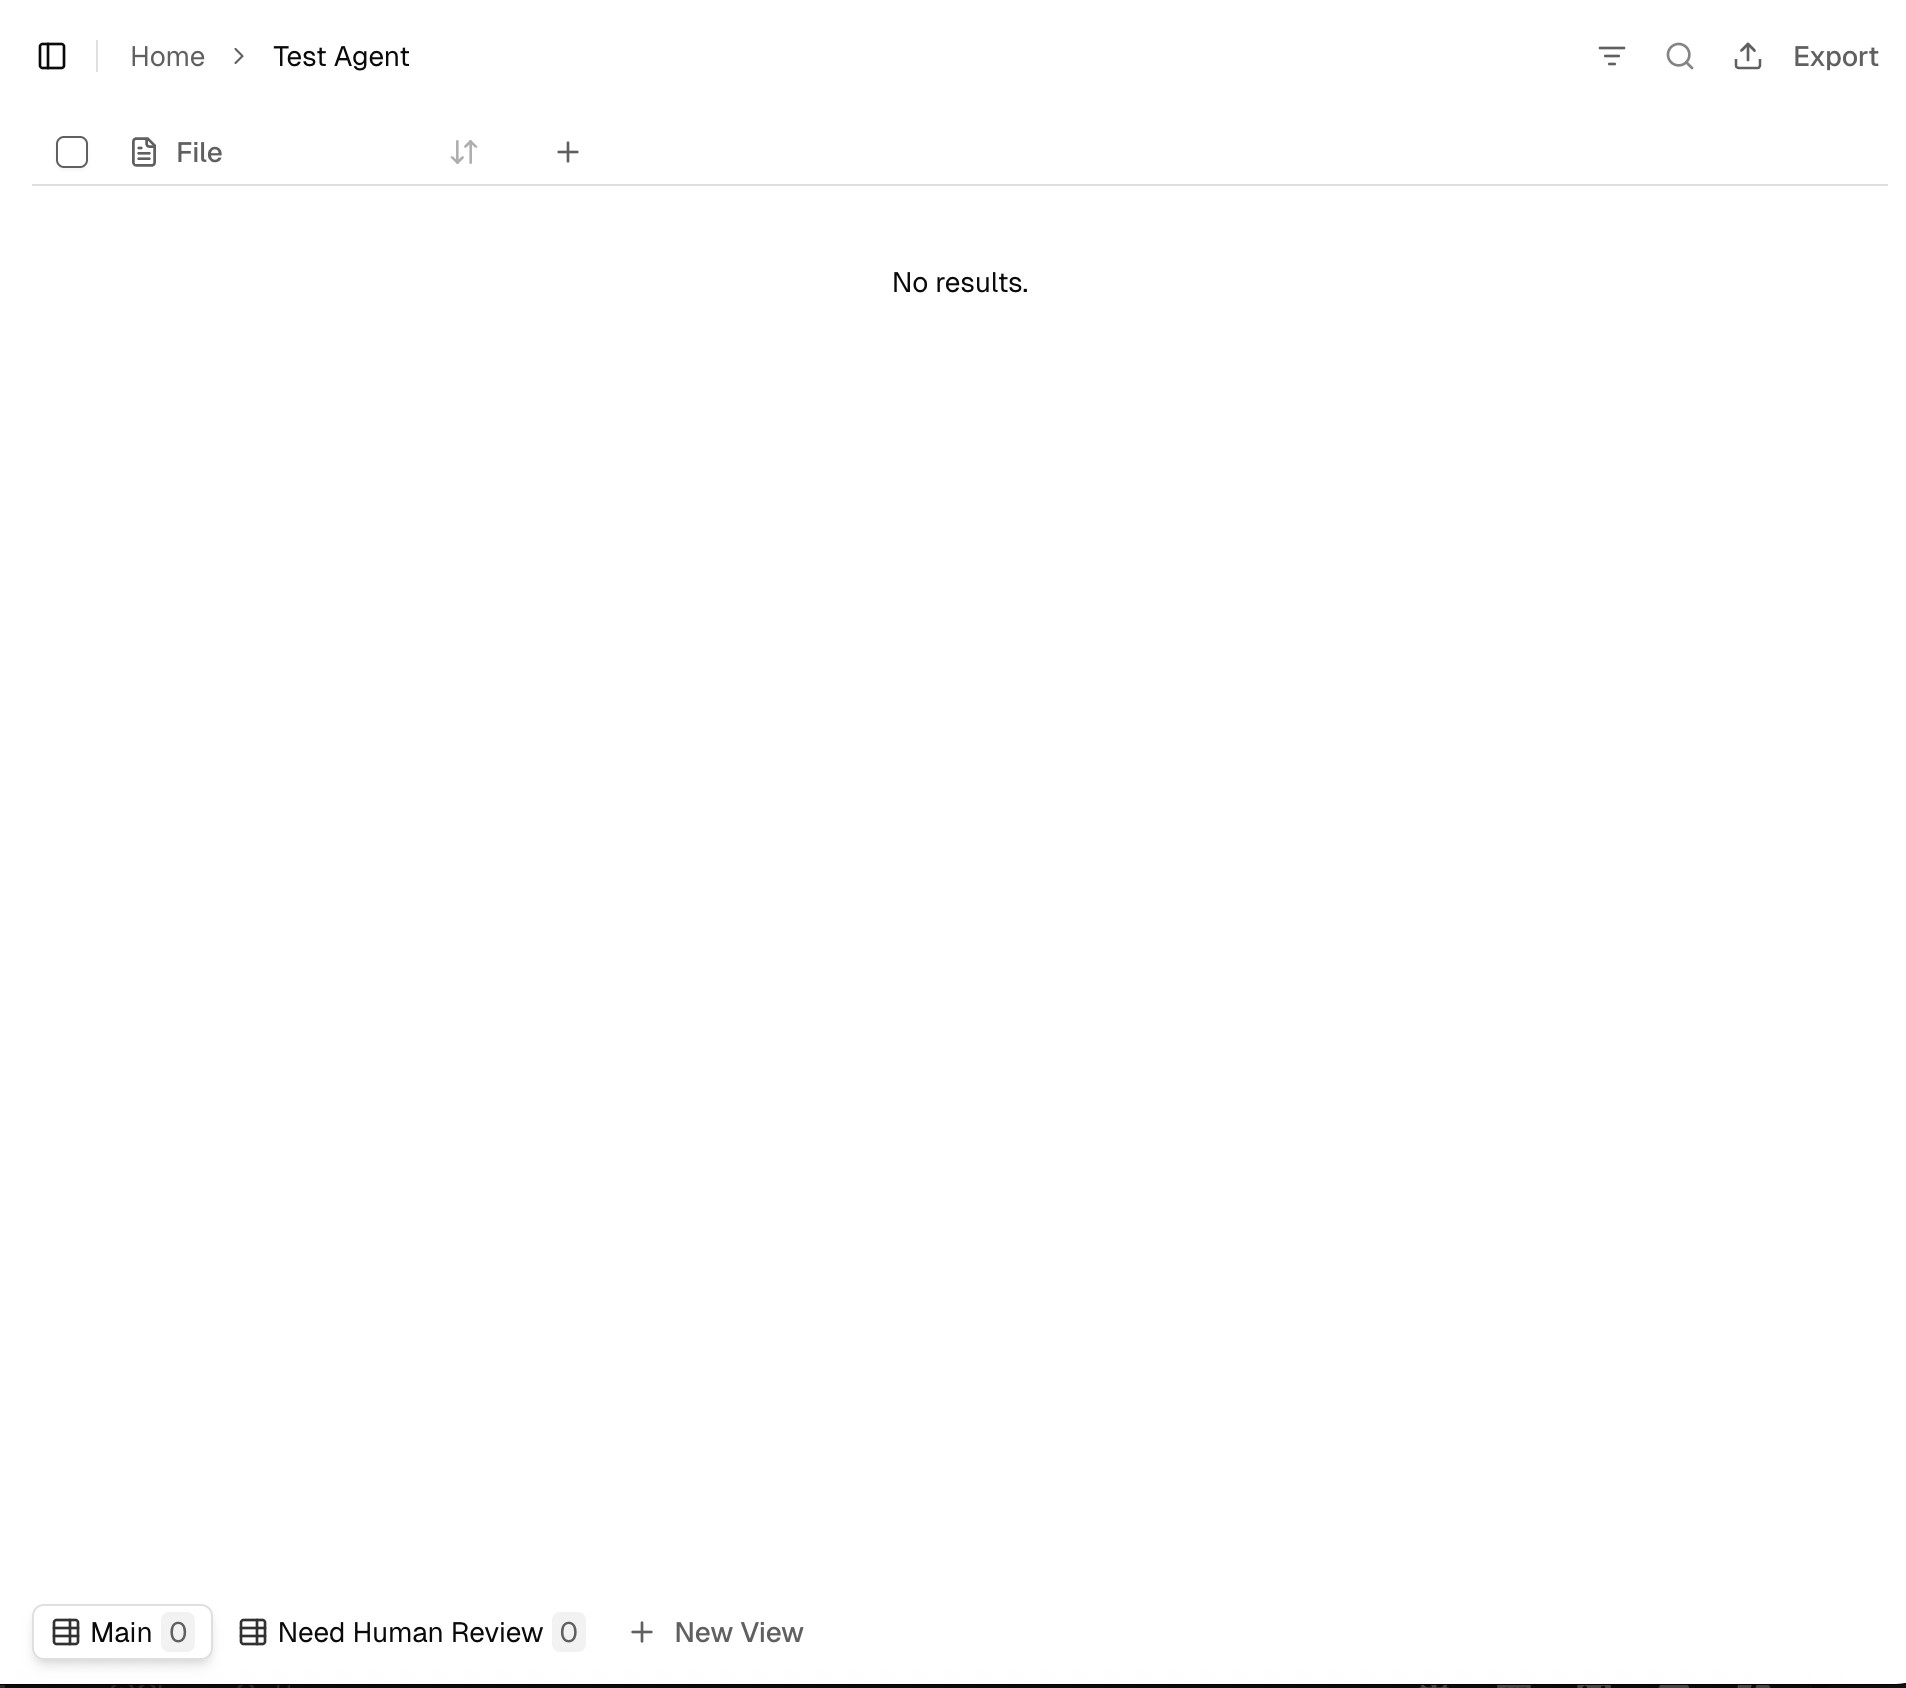
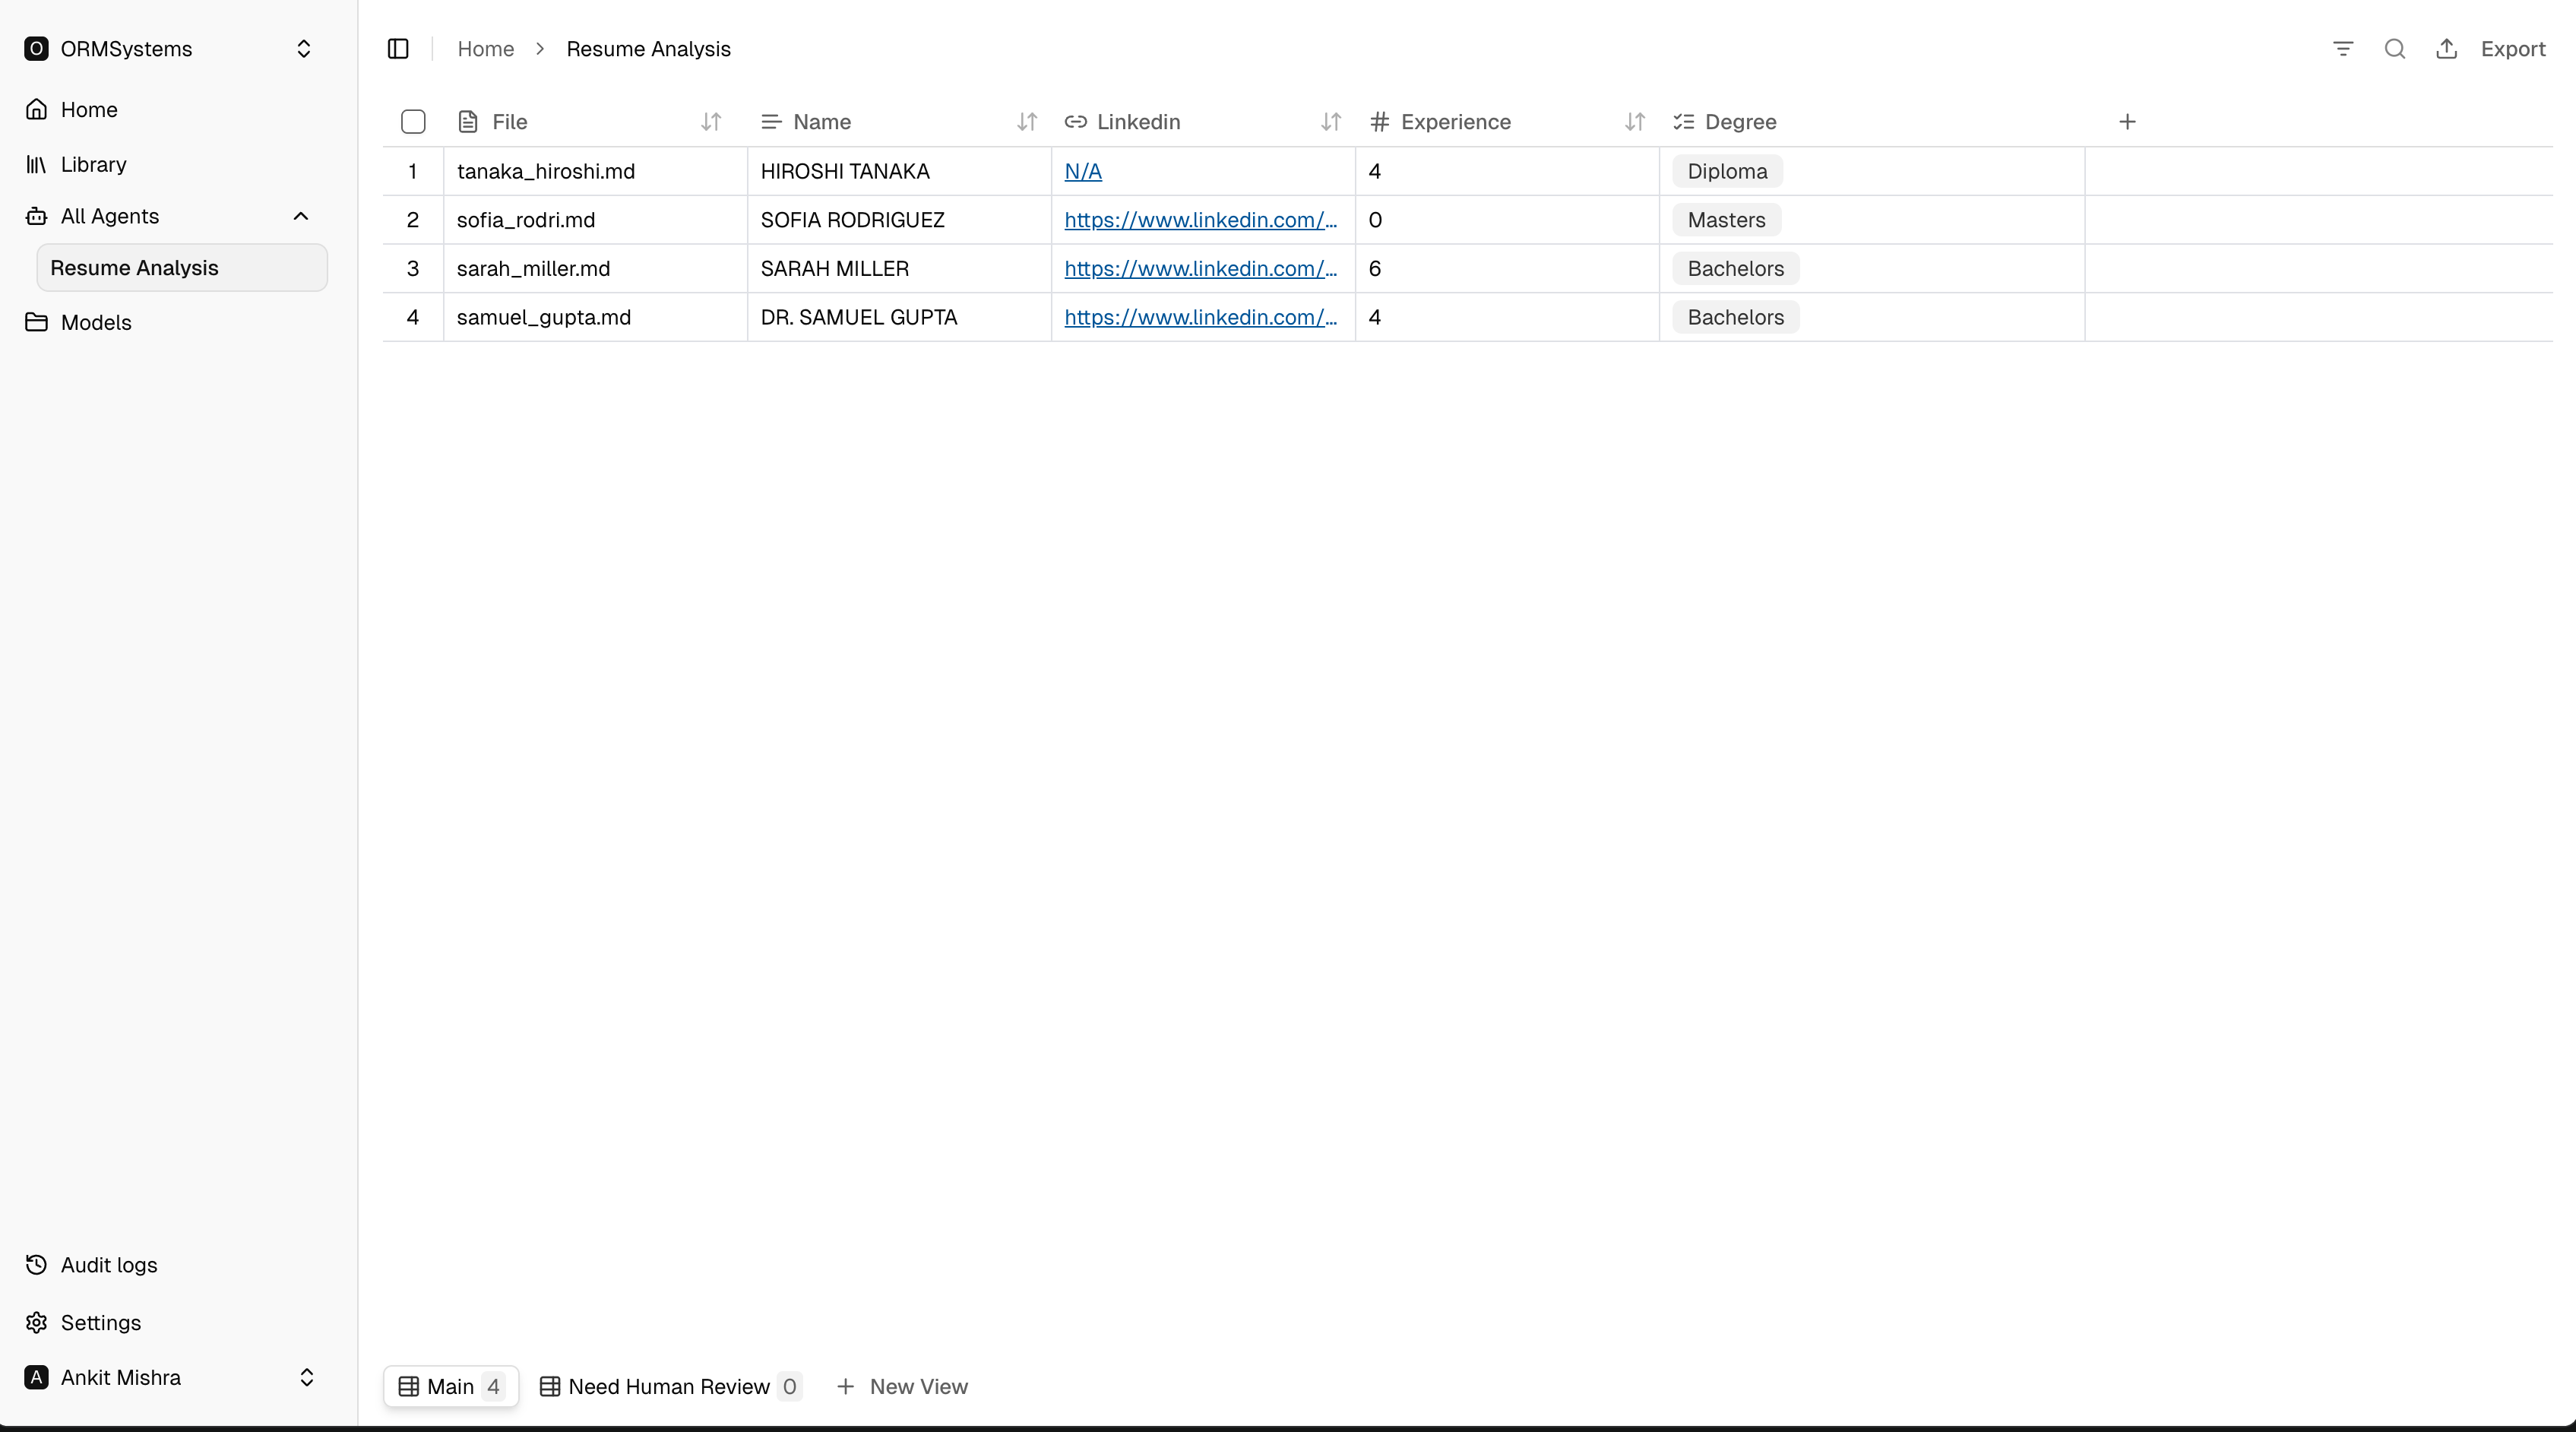 This screen shows the extracted results for your agent. Each row represents one processed file, and each column represents a field defined in the agent.
Use this screen to:
* Review extracted values for each file
* Compare results across multiple documents
* Verify whether the output is correct
* Export the processed data
### Views
At the bottom of the results table you will see multiple views — for example **Main** and **Need Human Review** — and the option to create a **New View**.
Views help you organize processed data and separate records that may require manual checking.
**Creating a View** — View creation is supported for Single Select and Multi Select field types. You can create a view from the field settings or from the bottom bar, then link it to a specific option to automatically filter assets into that view.
This screen shows the extracted results for your agent. Each row represents one processed file, and each column represents a field defined in the agent.
Use this screen to:
* Review extracted values for each file
* Compare results across multiple documents
* Verify whether the output is correct
* Export the processed data
### Views
At the bottom of the results table you will see multiple views — for example **Main** and **Need Human Review** — and the option to create a **New View**.
Views help you organize processed data and separate records that may require manual checking.
**Creating a View** — View creation is supported for Single Select and Multi Select field types. You can create a view from the field settings or from the bottom bar, then link it to a specific option to automatically filter assets into that view.
 ***
## Full Workflow Summary
Here is the complete end-to-end journey in Forge:
1. Start on the **Home** screen.
2. Click **New Agent** and enter the agent name and description.
3. Define the **fields** the agent should extract.
4. Configure or select an existing **model**.
5. Connect **Google Drive** in Settings (or upload files manually).
6. Let Forge fetch and process files automatically.
7. Review the **extracted results** in the agent table view.
***
## Full Workflow Summary
Here is the complete end-to-end journey in Forge:
1. Start on the **Home** screen.
2. Click **New Agent** and enter the agent name and description.
3. Define the **fields** the agent should extract.
4. Configure or select an existing **model**.
5. Connect **Google Drive** in Settings (or upload files manually).
6. Let Forge fetch and process files automatically.
7. Review the **extracted results** in the agent table view.